

A stud wall, otherwise known as a partition wall, is an excellent way to maximise the potential of your home. It allows you to divide one large room into smaller sections, accommodating an extra bedroom, office, playroom and much more. In most cases, a stud wall is constructed from a timber frame complete with plasterboard covering, which means that you are able to hang pictures, shelving and much more, providing that the weight is evenly distributed. If you’ve been asking how to build a stud wall, then this guide is all you need!
A Full Guide On How To Build A Stud Wall
Now, although typically, renovations projects like this require the assistance of a professional builder, building a stud wall can be done through DIY methods. With patience and attention to detail, you will be able to create a new room in as little as six key steps. Our builders in Olney and the surrounding areas, regularly share their tips with clients, and in this instance, they have put together a guide on how to build a stud wall yourself!
- How Much To Build A Stud Wall?
- Preparation For Building A Stud Wall
- How To Build A Stud Wall In 6 Steps
- How To Build A Stud Wall With Door Frame
- Steps For Building A Stud Wall Chimney Breast
- Steps For Building A Stud Wall Cupboard
- How To Build A Stud Wall Under Stairs
- How To Build A Stud Wall On Concrete Floor

How Much To Build A Stud Wall?
The cost to build your stud wall will depend on many factors, such as your requirements and needs for your house, such as the addition of electrical fittings, soundproofing or insulation or the thickness that you need your wall to be.
There are 3 main popular materials that our clients usually request.
These include:
- Timber: The cost of a timber stud wall measuring 3m x 2.4m x 125mm, is around £175 to £200. However, the average timber stud wall price is between £800-£900.
- Metal frame: The cost of a metal stud wall, measuring 3m x 2.4m x 100mm, is around £195 to £215.
- Glass frame: This is the most expensive material you can use for a stud wall and usually costs around £2700.

Preparation For Building A Stud Wall
Before you can get stuck in building a stud wall, there are a few factors that you will need to consider. The first is where you plan to place your new wall; the wall that you choose to secure your stud wall to must be secure, and you must check whether there are any internal cables or pipes. Once you have determined your positioning, it will then be essential to check that your plan complies with your local building regulations. The stud wall must not only meet the most recent guidelines, but it must also not alter the light, ventilation or fire resistance of your home. If you live in a listed building or conservation area, you will likely find that building regulations are stricter. To find the contact details of your local council building control department, we suggest using the handy postcode search on the LABC website.
Once you have gained the necessary approval to begin your project, you can then move onto the build itself. We suggest using the following steps:
Gather Your Materials & Wood For Stud Wall
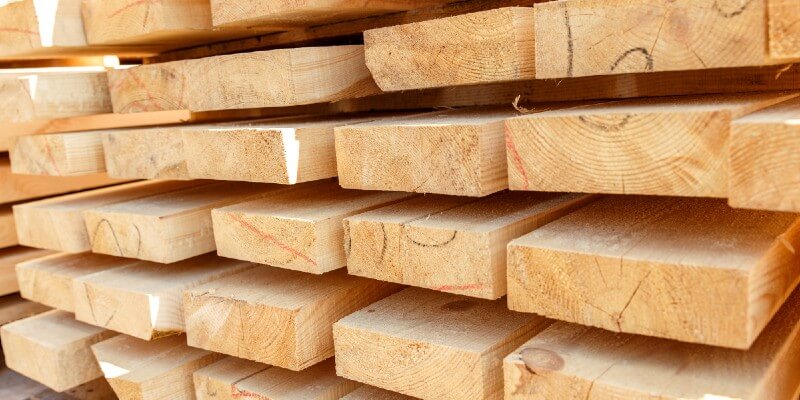
For a sturdy, long-lasting stud wall, you will need to ensure that you invest in the right quality materials. The best-fitting wood for stud wall is always timber, which, when accompanied by plasterboard, will provide you with a solid end product. To ensure that you gather all of the right materials and tools to begin your project, we have put together a list of what you will need to invest in:
Materials you will need:
- 50mm by 100mm vertical timbers
- 12.5mm plasterboard
- Skim plaster
- Metal studs
- Nails
- Plumb line
- Wood glue (this is optional but is likely to come in useful)
Tools you will need:
Last Steps Before Stud Wall Construction
Throughout our many years of building homes, conversions and extensions in Newport Pagnell and the surrounding local areas, we have found that there is one key step to a successful project – preparation. By taking the time to prepare your materials, each step will run far smoother.
Before you begin your stud wall construction, it is vital to take measurements and, from here, cut your materials to size. Start by measuring your floorplate by noting down the distance between where you will secure your wall and where it will end. The floorplate will need to fit between these two walls. Keep in mind that the floorplate cannot be installed on top of your carpet or existing flooring, so you will need to arrange for your floor to be bare.
It will also be important to check whether you have any existing windows, lighting or plug sockets that may impact the positioning of your wall, as any changes will need to be factored in before building the wall.
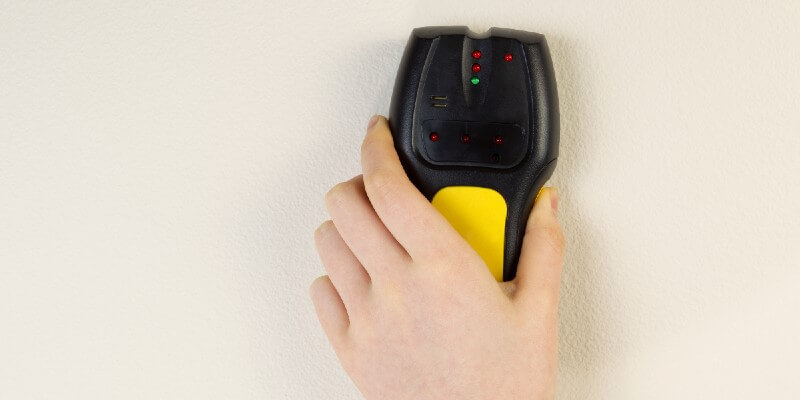
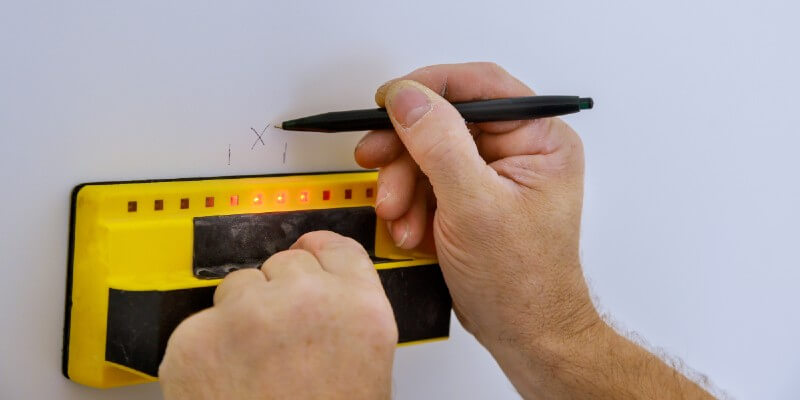
Lastly, using a stud finder, find and mark where to studs are located on your fastening walls. This will ensure that your new wall is fitted onto a solid foundation.
How To Build A Stud Wall In 6 Steps
Now that you have all of your materials laid out in front of you and any timber that can be pre-prepared has been cut, its time to move on to making a stud wall.
1. Fitting The Ceiling Plate
Once you have decided where you want your stud wall to be positioned, mark the spot and hang your plumb line. Follow the plumb line up towards the ceiling and once you’ve reached the top, make another mark and then draw a short line downwards.
Follow this line slightly onto the ceiling and then place a nail in the ceiling close to the wall junction; this will become the edge of the ceiling plate. Do the same on the opposite wall, and then using a chalk line, draw between the two nails, using a spirit level to ensure it is straight. At this point, we suggest using your finder again to check where the joists are, as this will be where your ceiling plate will be fitted to. If you are finding it tricky to find them using the detector, simply make small holes in the ceiling along your chalk line until you come across the joists – don’t worry, the ceiling plate will cover these. Be sure to mark any fixing point that you find next to your chalk line.
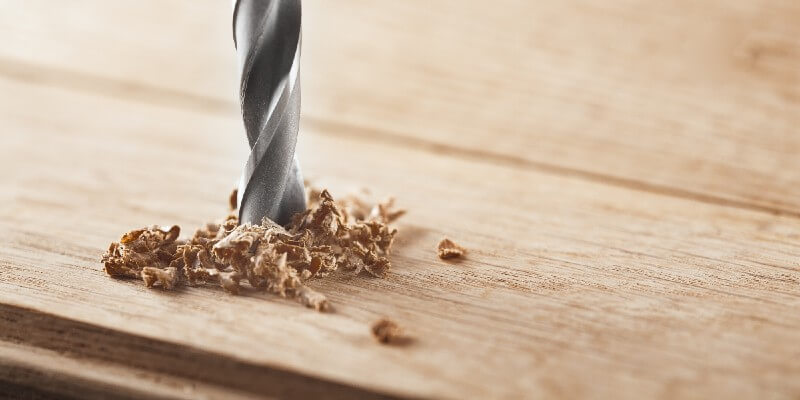
Next, you will need to grab your pre-measured and cut timber, hold it in place and then mark where your fixing points will be on the wood. Take the timber away from the ceiling and drill clearance.
To fix your ceiling plate, place the timber into position and then secure using cross-head wood screws – we’d recommend getting someone to help you with this part.
2. Fitting The Floorplate
Marking and fitting the floorplate will be far more straightforward, as you already would have determined where the timber will be placed. Ensure that your timber is cut to size, and then nail the floor plate into your bare flooring with around 400mm between each. If your existing joists are at a right angle to the wall, then follow the trail of their fixings to determine where to drive the nails into. For those with a solid floor, the holes will need to be drilled using a masonry bit and complete with screws and plugs.
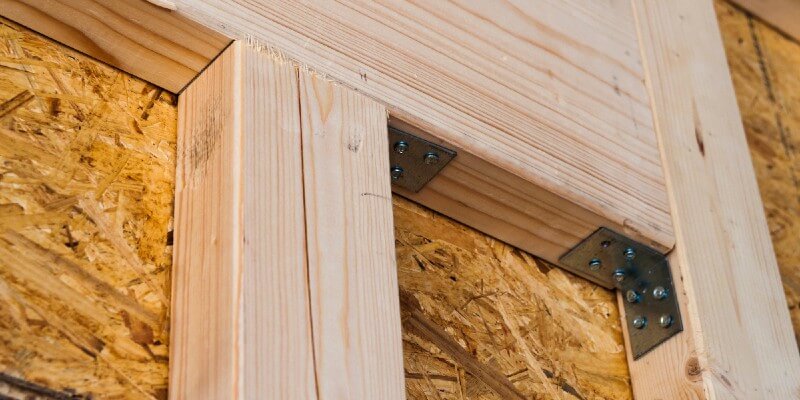
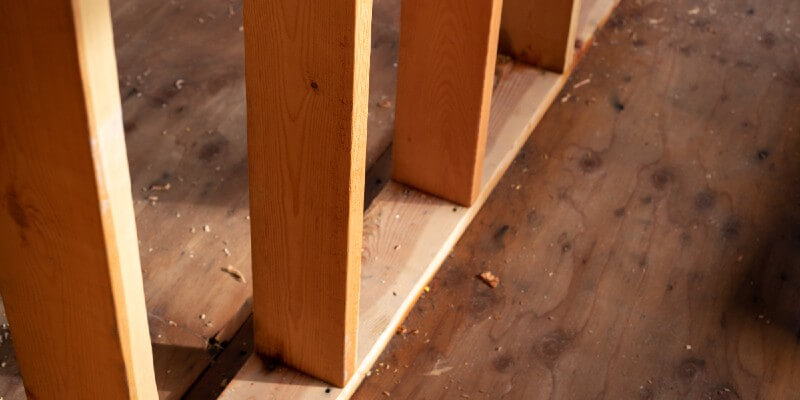
3. Fitting Vertical Studs
Measure the distance along your wall from the ceiling plate to the floorplate and cut your vertical studs to this length. If you have skirting boards, then we recommend using your hand saw to cut the timber to shape so that it fits tightly around the skirting boards. Once complete, the vertical studs can be drilled into place at equal intervals, beginning from the top of the skirting board.
4. Filling Your Framework & Stud Wall Spacing
Now that you have a framework in place, it’s time to begin your stud wall spacing to fill the wall and make it more sturdy. To do this, you will need to measure the distance between the bottom of your ceiling plate and the top of the floorplate, then cut vertical studs to size. We recommend spacing each stud around 400mm to 600mm from one another, as this will help you when you eventually apply the plasterboard. Ensure that when you secure them in place, they are a tight fit between the ceiling and floorplate.
Once your vertical studs are fitted, you will then move on to measuring, cutting and securing the noggins, which are the small bits of timber that lie between the studs. These add strength and prevent the wall from shaking once complete.
The noggins should be fitted in regular intervals and secured at each side of the studs using nails – this is where you can also use your wood glue if you feel necessary.
5. Housing Cabling & Plumbing Pipework
If you know that you will need to house cabling and pipework, then at this stage, you will need to make alterations to your framework.
For plumbing pipes, we advise carving out pipe runs on the timber using either a saw or chisel and mallet. Larger pipes, such as those for waste, typically need a deeper notch, so we advise adding extra support to the studs using a bridging piece.
On the other hand, when it comes to cabling, simply drill holes in the noggins, allowing extra room for air to circulate and stop the cables from overheating. You must ensure that there is not both cabling and pipework running through the same holes.
6. Measuring & Fitting Your Plasterboard Sheets
The final step to building a stud wall is to plaster the timber. Although this stage is simple, plasterboard can be heavy, so we recommend enlisting someone to help you. Start by cutting your plasterboard to size (this can be done with a craft knife), and then with your trusted helper holding it in place, secure it into place using a drill and nails.
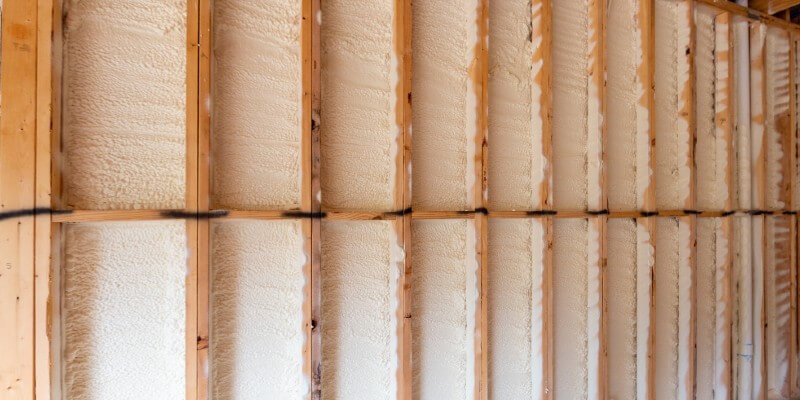
Once you have fitted the plasterboard to one side of the wall, head over to the other side to add your insulation. Insulation will be essential in not only keeping both of your new rooms warm but also for soundproofing, allowing them to remain usable for many years to come. You will have many options to choose from, including an insulation roll or insulation board. For more information on insulating internal walls, take a look at Build It.
After insulating your wall, you can then add your plasterboard and then complete the walls with a coat of skim plaster. Once dried, your walls can be decorated as you wish, whether this may be through painting or wallpapering.
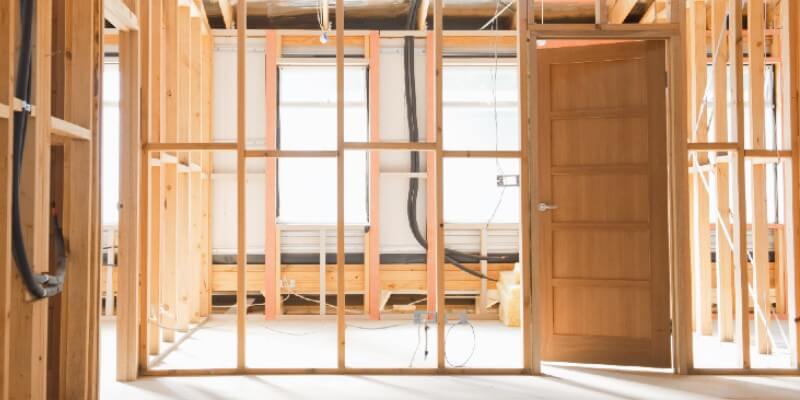
How To Build A Stud Wall With Door Frame
In some cases, you may want to add a doorway to your stud wall between your two new rooms. The steps on how to build a stud wall with a door frame will be similar to the above, but with a few slight alterations. You will need a pre-assembled door frame and then change your steps at the following stages:
- When measuring the floorplate, lay the pre-assembled door frame on the floor against the timber.
- Mark on the timber at each side of the door and then cut an opening.
- Using your pre-assembled door frame, measure a timber stud that will run horizontally across the top of the door.
- Stand the door frame up and then lightly nail it in place using a spirit level to check it’s straight. Hold your horizontal header stud in position, take away the door frame and then fix the stud in place.
- Add extra strength to your doorway by putting a small, cut-to-size vertical stud between the header stud and ceiling plate..
Steps For Building A Stud Wall Chimney Breast
Building a chimney breast into a stud wall is an easy and hassle-free project. However, you won’t be able to add a real fireplace to the wall because of the materials. A great alternative for this is an electric fireplace because this will get rid of any health and safety precautions and can help to keep your TV wires hidden, limiting any mess!
To complete this, follow the same steps of building a stud wall as we have previously outlined and secure the base of the fireplace structure by screwing it in. The fireplace you install will then sit directly on top of this and will be screwed in. A second structure of the fireplace will go on top of the fireplace, securing it all in. This will give you the peace of mind of knowing that there is no structural damage to your actual home and walls.
Steps For Building A Stud Wall Cupboard
For this, you should take care to be highly cautious. Although stud walls can withstand a lot of pressure and aren’t very fragile, they are not as strong as exterior brick walls, meaning that they cannot withstand extremely heavy furniture and cupboards.
There are a few ways you can avert this, such as installing ply above the stud wall to which you want to attach cupboards and then hanging the cabinets off of these. Also, avoid long screws as this can damage the wall and damage its strength or structure; instead, use toggles and anchors that level the weight better!

How To Build A Stud Wall Under Stairs
Whether you’re planning on converting the space underneath your stairs into an extra storage space or a functioning room, a stud wall is the easiest way to build a barrier between the rest of the room and the space under the stairs, the vertical top to bottom distance and the length of the bottom edge. With these measurements, you should have three that resemble a right triangle, meaning you can cut a piece of drywall to the sizes of all your measurements.
To build your under-the-stairs stud wall, our builders in Towcester recommend starting by measuring the horizontal distance of the space you intend to build in, from the corner of where your wall will meet your stairs to where you want it to end. Afterwards, install these as you would usually install a stud wall!
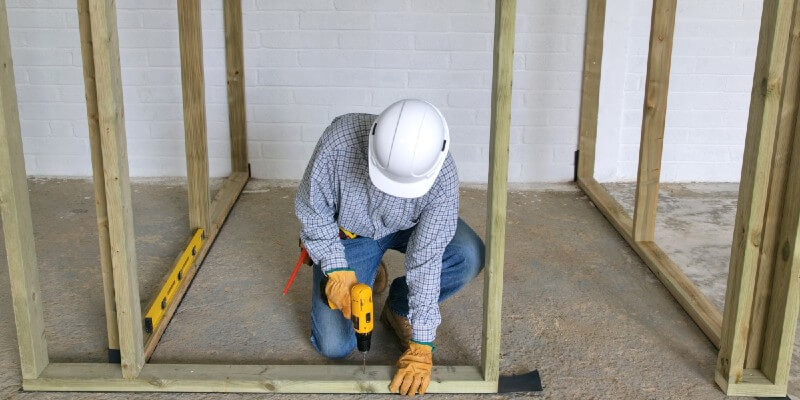
How To Build A Stud Wall On Concrete Floor
Building a stud wall onto a concrete floor can look tricky; however, it has been proven to be quite easy.
The wall beforehand needs to be fixed onto the materials that surround it to keep it in place; for this, invest in some timber base plates and drill into the holes, then insert the plugs.
Hammer these until they are flat against the surface of the wood, and then place a 4 inch screw and twist it into place so that it latches onto the plug; hammer this again until it is about 2/3 of the way under the surface.
If you need this to be further secured, then twist and wind the screw until it is properly secured. Continue this all the way around the wall and until the base is secured.
Building A Stud Wall Made Easy
Through using the steps listed above, you will be able to construct a sturdy, long-lasting stud wall that can be used to maximise your living space. Once built, it is entirely your choice how you decorate the wall, and you will be free to hang wall art, shelving and much more. The key is to take your time to measure, cut and secure every component, as rushing the process is likely to cause problems later on down the line.
If you have a larger project in mind or want to leave building new walls to the professionals, our team are always just a phone call away. Whether you need just one partition wall created or an entirely new extension, contact our builders in Newport Pagnell to ensure that every step runs smoothly!